Wednesday, October 03, 2012

Jeff's Brochette Recipe!

Well, it's not exactly Jeff's (of Fathairybastard fame), but it's as close as you can get.  I think most Brochette Shrimp recipes involved similar ingredients and steps.  

So, don't attribute this recipe too much to Jeff.  Suffice it to say, the boy drove over 960 miles (just my part...he also visited another friend that's a smart piece out of the way), keeping it all iced down,  just to bring my wife and I a taste of the Texas good life!

The Internet roughly describes the process he completed, in an attempt to duplicate some restaurant's dish, as:

Ingredients

  • 2 pounds large shrimp - peeled, deveined and butterflied
  • 1 (8 ounce) package Monterey Jack cheese, sliced
  • 3 fresh jalapeno peppers, seeded and julienned
  • 1 pound bacon, cut into thirds
  • 1 teaspoon Cajun seasoning, or to taste
  • skewers
Jeff's dish as it came out of the oven!

Directions

  1. Preheat a grill for high heat. Soak skewers in water.
  2. Place a strip of jalapeno into the opening of butterflied shrimp. Wrap with a piece of the bacon, and thread onto skewers so that the shrimp is pierced once through the head, and once through the tail, and bacon is secure. You can usually fit about 6 shrimp on a skewer. Make sure there is a little space between the shrimp, this will help the bacon cook better. Season both sides of the shrimp generously with Cajun seasoning.
  3. Lightly oil the grill grate. Place shrimp skewers on the grill, and cook for 2 to 3 minutes on one side. Turn, and place slices of cheese over the shrimp. Cook for another 2 to 3 minutes, until bacon is browned, and cheese is melted.
Like I said, this isn't his recipe, but it approximates it!

Jeff's take is similar to Pappasito's Cantina, and it goes like this: Just one skewer through the head of the shrimp. Slice the shrimp and put a small chunk of cheese and a slice of pepper in there and wrap it with bacon. Then slide the bacon on the skewer. I whip up a mixture of white wine and butter, with fajita seasoning, onion powder and a few other things whipped into the butter. Pour that over the shrimp before you grill them, and then whip up some more to dip the shrimp in. At Pappasito's, where I (Jeff) got the whole idea, they do a MUCH better job.
Just look at the finished product and the eagerness my wife is exhibiting!  Jeff is just like me, never eats without a camera nearby!

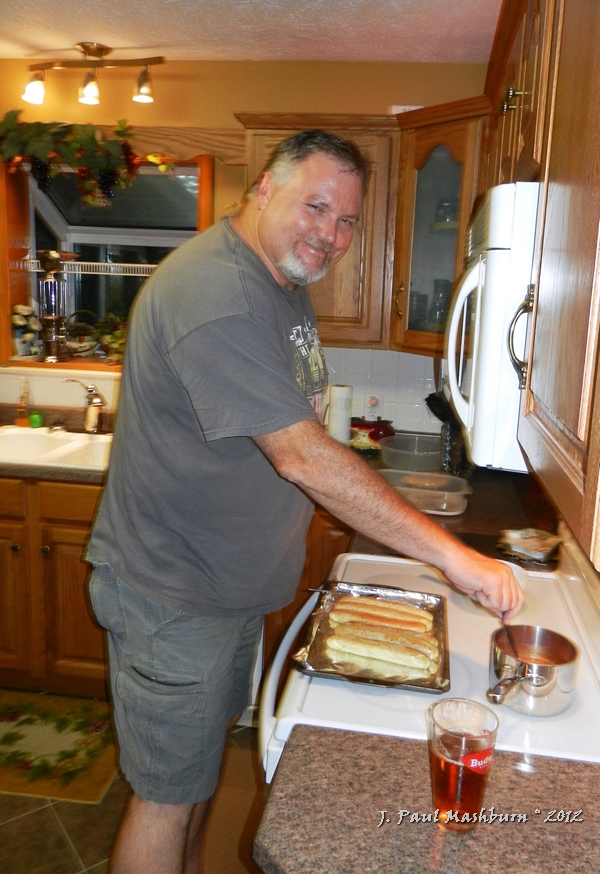
That's our traveling chef at the end of the table, enjoying his Fat Tire!  I want to thank him for this "guest post"...maybe he'll share more with us.
So, here is his finished product!  He whipped up the Mexican rice once he reached my kitchen, but the rest was just heated up!  It was well worth the wait!

Saturday, September 29, 2012

TALK ABOUT QUICK AND EASY

Well, all except the pinto beans!  Judy soaked them over night and cooked them most of the day, and man, was it worth the wait!
The trick is finding something to go with them that's quick and easy and just as yummy!
We settled on a Food City rotisserie chicken, a can of white/yellow hominy, mac'n cheese, and a big pone of cornbread!
Now, I don't care who you are, that's good eatin'! 

Yeah, it's mostly starch, well, maybe all starch, but who's countin'!?  Besides, there's protein in the beans!

Thursday, September 27, 2012

QUICK CHICKEN SOUP

Life is pretty easy around the old homestead these days.  We're retired...just watching grandchildren grow up!  So, we don't put a lot of effort into big meals anymore, except for special occasions.

That's what brought about this quick-n-easy chicken soup.

Okay, so the photo isn't up to my usual standards!
Judy was tired of everything, so soup was the only thing she thought she could stomach last week.  She found some canned chicken chunks, a can of mixed vegetables, a can of hominy, some kidney beans, an onion, and a big container of chicken broth.  That's about it...except for some additional seasoning to taste!

Throw it all together in a big deep pan and let'er simmer for a couple of hours. 

Serve it with your favorite cracker, or like we did, some tasty cornbread!  Yummy!

It's no fuss, one pan, and lots of comfort food!

Tuesday, September 25, 2012

A TAKE ON YATSOBI!

Yep, Yatosbi, Yakisobi, or some call it Yakasobi!  What ever!

We didn't know it was called either until I wanted to make sure of the ingredients on the Internet and discovered the recipe.

Well, ours came out of a local Baptist church recipe book, and it was simply called "Beef and Cabbage"!

Yatosbi has a couple more ingredients that didn't make it into ours, and, I'm tellin' you, it's still delicious.  Don't sound delicious at first glance, but, try it, you'll like it, and want more!

Here's the traditional Yatosbi dish ingredients that we left out:

    6 slices bacon, cooked and torn into bite size pieces (reserve 2 tbls bacon fat)
    3 garlic cloves, minced
    1 medium red onion, diced (about 1 1/4 cup)
    2-4 tablespoons light soy sauce
    light soy sauce, to taste
    crushed red pepper flakes (about 1/2 to 1 tsp) (optional)
It sounds good too, so you might won't to try it, especially since it has BACON...I probably will soon!

However, here's one I found on the net similar to ours, AFTER having made it from the church recipe:

Beef & Cabbage

1 lb ground beef
1 head shredded cabbage*
2 packages ramen noodles, beef flavor=crushed
3 shredded carrots
4 c. water

Brown beef and drain grease. Add remaining ingredients, including seasoning packets from soup. Cover and simmer about 20 minutes. Season to taste. *I {original net recipe maker} used 1/2 head. You can also use slaw mix, rather than shredding the cabbage yourself.

Leave the lid off a few minutes for excess liquid to evaporate.

Judy did it exactly like that, except she did add on chopped onion, and I think it made a difference!

The picture does nothing to make you want to try it, but the taste is wonderful!  

So, it's a another quick meal that even I could have made, and it does satisfy the palate!

Saturday, September 22, 2012

A Vegetarian Supper For Ellen

You won't see that word, vegetarian, on my cooking blog very often, but this is one of the few that even Ellen DeGeneres might eat!

We were sitting around watching a little late afternoon TV, around about news time, when hunger pangs/pains hit us at about the same time.  We had been eating a lot of animal flesh over the previous days, so we wondered out loud what in the world we could have for supper (that's dinner to you northern folks) that didn't involve another meat sacrifice!

Luckily, Judy had been cooking greens beans since about mid-day, so one thing was ready, so, what to go with it!?

We decided on  cornbread, which  was the obvious thing to have if just beans were on the table, but something more was needed.  

She remembered buying some fresh vegetables the day before and mentioned that to me.  A vegetable meal sounded good to me, but I didn't want anything breaded and fried, at least that day!

So, while she finished up the green beans, mixed up the cornbread, put it in the oven, and cleaned up the corn-on-the cob, I busied myself washing and cutting up the other vegetables.

We had bought okra and squash for the purpose of frying up our annual "fried garden meal", but with frying out of the question, I cut the items up, mixed them in a bowl with vegetable oil, sea salt, cayenne pepper, garlic, pepper, and creole seasoning.  
Along the way, I also found one red and one orange bell pepper and a big fat onion, which also fell to my knife and all got mixed into the bowl!

I then spread them on a sheet of aluminum foil over a cookie sheet and waited my turn for the oven.
Judy wrapped the corn in paper towel and placed them in the microwave.  When the time came, a press of a button for about 6 minutes, that would bring everything to the table hot!

The oven dinger went off and out came the cornbread, and in went the vegetables; turned down to 400.  In about 10 minutes the corn was nuking, and in another 10 the broiler came on at 500 (for a little browning), and when I judged them to be fit for consumption, out they came.  They were sizzling and smelling so good!
I think we may have had another meal of leftovers, but as I write this I'm so hungry I think I could have eaten it all!  The cornbread made it all that much better...and especially with an ice cold glass of Mayfield's 1% Nuture milk!  

I sure hope Ellen at least drinks her milk!  If not...so sorry for her!

Wednesday, July 18, 2012

HOW TO COOK FORK-TENDER PORK CHOPS

So, there I was shuffling through Food City, just needing a gallon of milk and some bread, when I spotted a package of the most beautiful pork chops I've ever seen!  There, beckoning to me, were two, about 1" thick chops with the bone in; center cut or pork loin chop include a large T-shaped bone.

Almost instantly I visualized how they needed to be cooked.  I knew that if I let my wife cook them, mine would wind up dry and tough.  She loves to kill her meat dead...no hint of pink in her steak; her chicken and chops cooked white and flavorless...so I had to save these from total destruction!

I quickly stuffed a large sweet potato under my arm and headed for the check out with the chops, milk, and bread.

One the way home I went over and over my cooking scenario, and just the right language to use to show Judy just how important it was for me, and me alone, to cook these chops!

Fortunately, she was in just the right mood to let me cook.  Huh, who am I kidding, she's always in the mood for letting me cook!

I got out an iron skillet, and turned the stove eye up as high as it would go.  While it was heating to nearly a red glow, I washed the chops off.  There are always little bones on steaks and chops that can ruin a great eating experience.

I salted, peppered, and added some garlic powder to one side of the chops, and plopped them, seasoned side down, in the hot skillet.  As the down side was getting properly browned, some parts blackened, I seasoned the up side, and then turned them over.

On a cookie sheet, I spread out one layer of aluminum foil and then placed 2 smaller sheets on it for the chops.  I took the seared chops out of the skillet and placed each one on its own sheet of foil.  I then wrapped them up carefully, making sure they were completely enclosed.

I washed the sweet potato and placed it, unwrapped, on the cookie sheet and slid it all into a 400 degree oven for 1 hour!

After one hour, I unwrapped both chops, poured off the juices, and re-wrapped mine.  I left Judy's uncovered in order to properly brown and kill it!
I put it all back in the oven for just 15 minutes more.

I plated the supper, slathered the potato with some butter, sprinkled on some brown sugar, and sat down to see if I had accomplished what I wanted...a fork-tender chop.  

Success!  I was indeed fork-tender, and the whole meal was properly cooked in 75 minutes!

Thursday, June 14, 2012

JUDY'S POTATO SOUP

My wife is laid up recuperating from dental implant surgery, so cooking has been up to me the last few days.  She gave me her recipe for potato soup prior to the drugs, so it should be fairly accurate and turn out great!

First, and worse part of the process, is peeling the Yukon Gold's!  She prefers this potato for soup...probably what her mother used...truth be known!  Once peeled, wash, and cut into cubes, about 1/4 to 1/2 inch in size, and put into a quart size boiling/sauce pan.  We laughed last night over remembering how old folks used to refer to this size pot as a "stewer", but it came out more like "stuer", especially in the South.

I cut up about 10 medium size (just right to hold in the palm of your hand), and dumped the cubes into the pan.  I fill the pan up, just over the potatoes, with chicken broth, saving some to make up later for what evaporated.

There is no need for extra salt, the broth is plenty salty, but I added a little garlic powder and pepper.  I also grated a Valida onion, until I had enough to cover the palm of my hand, and started the pot heating.  I turned the element on high until I got a good boil going, and then turned it down to medium and set the timer for 45 minutes.

When the timer alerted me, I refilled my glass with Fat Tire, seems I have to have a Fat Tire in my other hand when I cook, and cut off some pieces of Velveeta Cheese, and poured in about a cup of Half & Half.  I turned the heat to SIM and let it be for about an hour.

It's not necessary to cook that long, especially since the potatoes were soft in 45 minutes, but I was posting this, so it took me about an hour to take the photos, check Facebook, and re-size the shots!  I also had to make some cornbread.

You ain't Southern if you eat a meal without cornbread!

I've posted this before, but here it is again for you late comers!

Put a small size iron skillet in the oven at 425 degrees, with about a 1/4 cup of oil in it...I used vegetable oil, but my Granny Mashburn would have put in about a table spoon chunk of lard!  This heats the skillet and the oil, and will be just right after you do the following...

Put 5 to 6 tablespoons of self-rising cornmeal in a mixing bowl (small), then put in a teaspoon spoon of sugar, sprinkle in a little salt (I like sea-salt now) and pepper.  Then add a heaping tablespoon of self-rising flour, and one large egg.  Mix these ingredients and then add enough milk or buttermilk to make the mixture very soupy!

Open the oven, and take out the skillet, pour the hot oil into the mixture, and mix!

Then pour the mixture back into the hot skillet and and close the door.  Set the timer for 20 minutes.

That's it!  You have just made the best cornbread your mouth has ever tasted.  Oh, you can add diced jalapenos, cheese, if you want, but for this meal you don't need it.  Save that for chili!
 
I then turned the soup on low, and continued surfing!

When the 20 minutes are up, take the bread out, flip the "pone" upside down, that browns the top better, and let it sit on the stove top until you are ready to eat.

I'm dying to eat, but she is still napping off the lunch round of pain medication, so the soup will be fine, on low, until she wakes up in about 30 minutes.

When we do eat, we'll add a teaspoon of sour-cream to our bowls, I'll butter my bread, and we'll chow down! 

Okay...refill time!  See ya!

Monday, January 30, 2012

MESSING WITH "FLAVOR BOOST"

My wife was feeling poorly this afternoon, and we know now that she probably has strep throat!  Anyway, someone had to cook, and it was obviously going to be me!

We usually keep frozen chicken tenderloins in the freezer, so the protein was a given.  We had also been snacking on carrot, squash, and turnip slices for the last week, so the vegetables were also chosen for me!

I fried the chicken in olive oil, letting one side heat up and then flipping it so the thawed and oiled side would hold the  sprinkles of cayenne pepper, sea-salt, and black pepper seasonings.  I then rolled each over and season the opposite side and continue frying.

When the chicken is tender enough to break into bite size pieces using the spatula, pour in the vegetables you've already chopped into stripes and pieces, and add a teaspoon of minced garlic.

When the vegetables are done to your liking (I like mine crisp) add in the Swanson's Chicken Flavor Boost.  I only used one for this recipe, but I may add two the next time.

The Flavor Boost packets are a great way to quickly add flavor to a dish where a lot of liquid is not needed.  It's basically chicken bullion with special seasons, so it works perfectly when you're in a hurry.

If you wanted, you could add a side of rice, but we enjoyed it just right out of the skillet with a cold glass of milk!

See ya next time!
Related Posts with Thumbnails